Hello everyone! This morning I was dying beans for my new group of kindergarteners and thought I would write a quick tutorial on how I dyed them. This sensory bin is all about COLOR and therefore I wanted them to be super vibrant.
To do this, I went the grocery store (I went to Whole Foods) and bought the beans in bulk. (It’s cheaper this way– plus Whole Foods has awesome bulk containers that I use over and over again!)

I ended up buying:
3 containers of yellow lentils (because they were on sale)
2 containers of navy beans
2 containers of lima beans
and 2 containers of white kidney beans
I could have bought all the same beans but I wanted a variety in texture, size, and shape to encourage that conversation while the kids are playing.
To dye the beans you will need rubbing alcohol, ziplock baggies (freezer size), baking trays, parchment paper, and some sort of dye. Personally I like to use liquid watercolor as it creates a super vibrant color but food coloring works too. If you are using food coloring, I have had the most success using the gel colors.
Making the beans took me about 30 minutes and when you use rubbing alcohol, they dry pretty quickly.
Dying The Beans:
Step one: Pour 1.5- 2 cups of beans into a baggie.

Step 2: Add 2 tablespoons of rubbing alcohol into the bag.

Step 3: Add your dye.


Step 4: Seal the bag (tight!!) and shake up the beans so that they are coated with the dye.

If the color isn’t exactly what you were going for, add more dye. In my opinion, if you want a vibrant color, don’t be stingy with the dye. In the past when I have used neon food coloring, I used anywhere between 30 drops- the entire bottle of food coloring per bag. With the liquid watercolor, I didn’t measure but my guess is I added about 1/4 cup. I then let the beans soak in the dye for about 15 minutes.
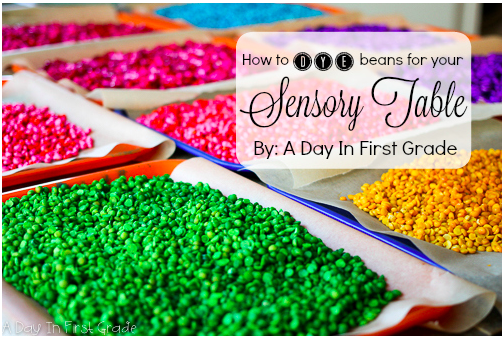
This is what my beans looked like inside the bags.

Step 5: Cover your tray with parchment paper and then dump the contents of the bag onto the tray. I use a utensil to make sure the beans are spread out.


Step 6: Once the beans are dry you can add them to your sensory table!
Aren’t they pretty?!? I can’t wait for my new batch of kindergarteners to explore with them!
